A single loose connection between your wiring and the ground can be the difference between a safe home and a fatal shock. That is why knowing how to install earthing system correctly is one of the most important electrical-safety skills any homeowner, builder, or electrician can master. Earthing quietly protects your family and appliances every second of every day — channelling dangerous fault current safely into the soil before it can harm anyone.
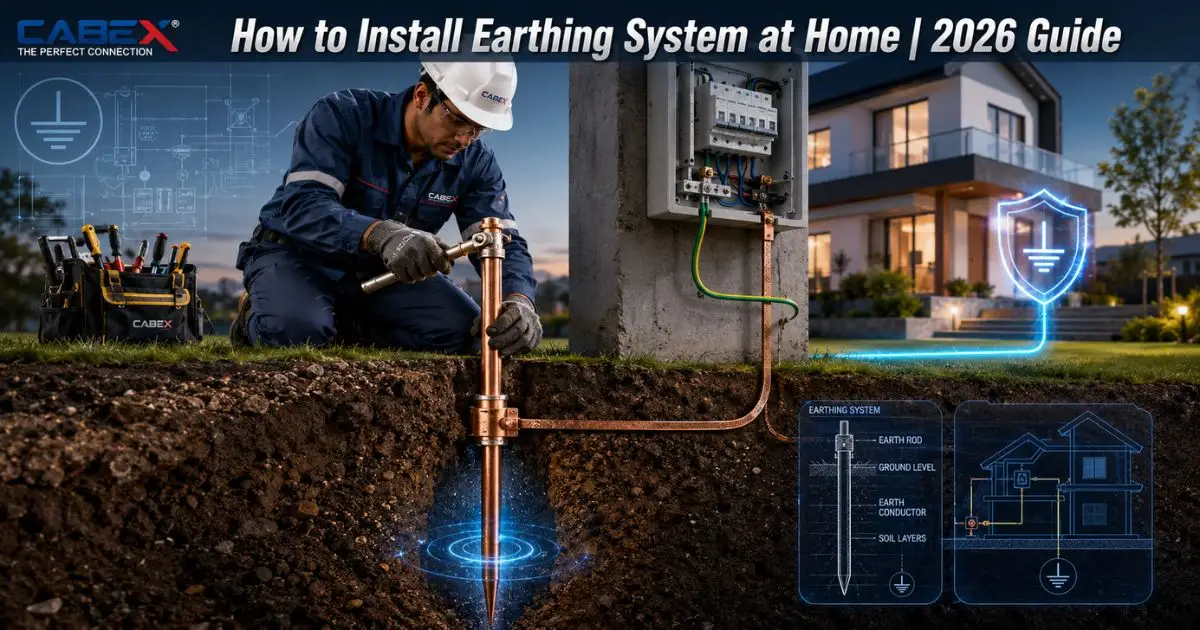
In this complete 2026 guide, the engineering team at Cabex India explains exactly how to install earthing system in a residential setting — from choosing the right electrode and tools to digging the pit, wiring the connection, and testing earth resistance. Whether you are wiring a new house or upgrading an old one, this step-by-step walkthrough will help you do it safely, legally, and to standard.
What Is an Earthing System and Why It Matters
An earthing system (also called grounding) connects the non-current-carrying metal parts of your electrical installation — and sometimes the system neutral — to the general mass of the earth through a low-resistance conductor. When insulation fails or a live wire touches a metal appliance body, this path lets fault current flow straight to ground, tripping your MCB or RCD before anyone is hurt.
Before you learn how to install earthing, it helps to know what a good earthing system delivers:
- Human safety: Prevents fatal electric shocks by keeping touch voltages low.
- Appliance protection: Shields TVs, refrigerators, and electronics from surges and faults.
- Lightning & surge dissipation: Routes high-energy transients safely into the soil.
- Stable reference: Gives the whole installation a steady voltage reference.
- Code compliance: Meets IS 3043 (India’s earthing code) and IEC 60364 worldwide.
In India, residential earthing is governed primarily by IS 3043 (Code of Practice for Earthing), and following it is the foundation of doing this job right.
How to Install Earthing System: Tools & Materials You Need
Getting the materials right is half the battle. The table below lists everything required when you install earthing at home, along with its purpose.
| Material / Tool | Purpose | Typical Spec (Residential) |
| Earth electrode (plate/pipe/rod) | Primary contact with soil | GI plate 60×60×6 mm or GI pipe 40 mm × 2–3 m |
| Earthing conductor | Connects electrode to main board | GI strip / copper wire as per load |
| Charcoal & salt | Lowers soil resistivity, retains moisture | Alternating layers around electrode |
| Funnel & watering pipe (GI) | Keeps soil moist long term | 19–40 mm pipe with mesh top |
| Earth clamps, lugs & bolts | Secure, low-resistance connections | Corrosion-resistant, rated to conductor |
| Earth resistance tester | Verifies final earth resistance | Clamp meter or fall-of-potential kit |
Always choose certified, corrosion-resistant accessories — a cheap clamp or lug is the most common point of failure in a home earthing system.
How to Install Earthing System: Step-by-Step Method
This section explains how to install earthing system using plate earthing, the most common and reliable method for homes. The same principles apply to pipe earthing.
Step 1: Choose the Earthing Location
Pick a spot a safe distance (at least 1.5–2 m) from the building foundation, ideally where the soil stays naturally moist and is easy to reach for future watering and testing. Avoid areas near drains carrying chemicals or where the soil is purely rocky.
Step 2: Dig the Earth Pit
Excavate a pit roughly 3 metres (10 ft) deep and about 1–1.5 m wide. Reaching this depth helps the electrode sit in permanently moist soil, which keeps earth resistance low and stable throughout the year.
Step 3: Place the Earth Electrode
Lower the GI or copper plate vertically into the pit. If you are using pipe earthing instead, drive the perforated GI pipe vertically into the centre of the pit. The electrode must sit fully within the moist soil layer.
Step 4: Add Charcoal and Salt Layers
Surround the electrode with alternating layers of charcoal and common salt. This classic combination absorbs and retains moisture while reducing the surrounding soil resistivity — a vital step in how to install earthing in a building so that resistance stays low even in dry months.
Step 5: Connect the Earthing Conductor
Bolt the earthing conductor (GI strip or copper wire) firmly to the electrode using a tinned earth clamp or lug. Run this conductor up through a GI pipe to the surface and onward to your main distribution board’s earth bar. Every joint must be tight, clean, and corrosion-protected.
Step 6: Install the Watering Arrangement
Fit a GI funnel and watering pipe over the electrode, finished with a small inspection chamber (earth pit cover) at ground level. This lets you pour water periodically to keep the soil moist — essential during summer.
Step 7: Backfill and Compact
Refill the pit with alternating soil and the charcoal-salt mixture, compacting each layer to remove air gaps. Good soil contact is critical for a low-resistance earth.
Step 8: Test the Earth Resistance
Finally, measure the earth resistance with a tester before energising. This step confirms whether your installation is safe — covered in detail below.
How to Install Earthing in a Building vs a Home
The core method is the same, but scale and requirements differ. The comparison below shows what changes when you move from a single home to a larger building.
| Factor | How to Install Earthing in Home | How to Install Earthing in a Building |
| Number of earth pits | Usually 1–2 pits | Multiple pits, often interconnected |
| Electrode type | Plate or pipe earthing | Plate, rod & chemical earthing |
| Conductor size | Sized to household load | Larger strips sized to total load |
| Target resistance | As low as practicable (≤5 Ω) | ≤1 Ω for critical/large loads |
| Earthing grid | Single connection point | Bonded earth grid + equipotential bonding |
For multi-storey buildings, separate earth pits for power, lightning protection, and sensitive electronics are often bonded together to form a unified, low-resistance earthing grid.
Acceptable Earth Resistance Values
Knowing how to install earthing is only useful if you can confirm it works. Earth resistance must fall within accepted limits. Use the reference values below.
| Installation Type | Recommended Earth Resistance | Notes |
| Residential home | ≤ 5 Ω (as low as practicable) | Lower is always safer |
| Large building / commercial | ≤ 1 Ω | Critical & high-load installations |
| Power station / substation | ≤ 1 Ω | Strict utility requirement |
| Lightning protection | ≤ 10 Ω (often lower) | Per protection design |
Measure resistance using a clamp-type earth tester or the fall-of-potential (three-point) method. If the reading is too high, add more charcoal-salt fill, water the pit, deepen the electrode, or add a second pit and bond it in.
You May Also Like This – Electrical Safety Accessories: The Ultimate 2026 Guide
Common Mistakes to Avoid When You Install Earthing
Even experienced installers slip up. Steer clear of these frequent errors:
- Shallow pits: Electrodes placed above the moist layer give high, unstable resistance.
- Loose or corroded joints: The leading cause of earthing failure — always use quality clamps and lugs.
- Skipping the watering arrangement: Dry soil dramatically increases resistance in summer.
- Undersized conductors: A thin earth wire can overheat and fail during a fault.
- No periodic testing: Earthing degrades over time; test it at least once a year.
- Mixing dissimilar metals: Causes galvanic corrosion at joints — match materials or use bimetallic connectors.
Maintenance: Keeping Your Earthing System Effective
A well-installed earth is not “fit and forget.” Keep it reliable with these habits:
- Water the pit periodically, especially during dry summer months.
- Inspect joints and clamps annually for corrosion and tightness.
- Re-measure earth resistance at least once a year and after any major electrical work.
- Keep records of test readings to spot gradual deterioration early.
- Replace corroded accessories promptly with certified components.
Why Choose Cabex India for Earthing Accessories
With over 25 years of engineering expertise, Cabex India (Cabex Electrical Components, Jamnagar, Gujarat) is a trusted manufacturer of ATEX & IECEx-certified earthing and lightning protection accessories. When you install earthing at home or in a building, the system is only as reliable as the components holding it together. Cabex India supplies the high-quality parts that make every connection safe and durable, including:
- Earthing electrodes, rods, and plates
- Earth clamps, lugs, and connectors
- Lightning protection accessories
- Conductors, cable glands, and fixings for hazardous areas
Engineered for low resistance, corrosion resistance, and long-term safety, Cabex India components deliver “The Perfect Connection.” Explore the full earthing range at cabex india to specify the right solution for your project.
Build a Safer Home with Cabex India Earthing Accessories
No matter how carefully you install earthing, your system depends on the quality of every clamp, lug, and electrode. Cabex India’s Earthing System Accessories are engineered for low resistance, corrosion resistance, and decades of reliable service.
👉 Explore the full Earthing System Accessories range at cabexindia.com and build a connection you can trust.
Conclusion
Learning how to install earthing system at home is one of the most valuable safety investments you can make. By choosing the right electrode, digging a deep enough pit, adding charcoal-salt layers, making tight corrosion-free connections, and verifying earth resistance, you create a path that protects your family and appliances from electric shock, surges, and lightning for years to come. Always follow IS 3043 and IEC 60364, test your system annually, and never compromise on component quality. Pair correct installation with certified, corrosion-resistant accessories from Cabex India, and you will earth your home right the first time — because reliable earthing is never optional.
Frequently Asked Questions (FAQs)
1. How do I install an earthing system at home?
Dig a deep pit, place a plate or pipe electrode in moist soil with charcoal-salt layers, connect a conductor to your main board, and test the earth resistance.
2. What earth resistance is acceptable for a home?
Aim for 5 Ω or lower, since the lower the earth resistance, the safer the installation.
3. Which earthing method is best for a house?
Plate and pipe earthing are most common for homes, while chemical earthing suits maintenance-free, low-resistance needs.
4. How deep should an earth pit be?
A residential earth pit is generally about 3 metres deep so the electrode sits in permanently moist soil.
5. Where can I buy reliable earthing accessories?
Cabex India offers ATEX & IECEx-certified earthing electrodes, clamps, and lightning protection accessories at Cabex India.